
Engineered Wood Floor Maintenance When to Sand Clean Screen or Recoat
Engineered wood floors can look tired long before they need replacing. The challenge is knowing whether the floor needs a simple clean, a fresh coat of finish, a light screening, or full sanding.
That decision matters because engineered wood is not the same as solid timber. It has a real wood wear layer on top, but that layer is bonded to a stable core beneath. This construction makes engineered flooring practical and attractive, yet it also means heavy sanding has limits. Remove too much of the top layer and the floor may be permanently damaged.
Good maintenance starts with choosing the least aggressive method that solves the problem. A dull floor may only need a proper clean. Light surface scratches may respond well to screening and recoating. Deep scratches, worn-through finish, staining, or uneven colour may call for sanding.
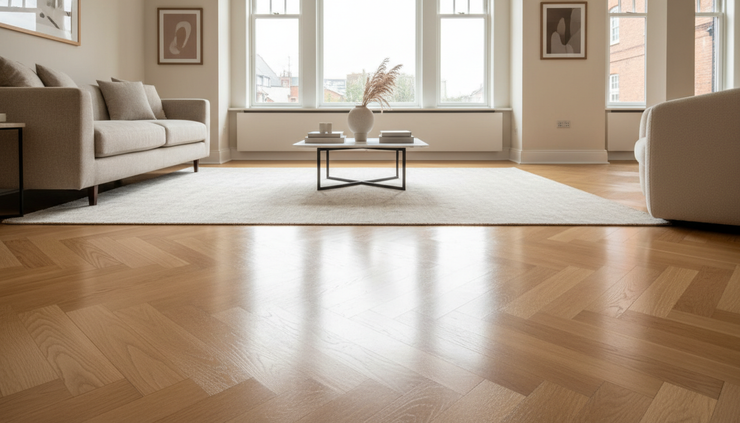
Engineered wood floors need a different maintenance mindset
An engineered wood floor has a top layer of hardwood, often called the veneer or wear layer. Under that sits a plywood, softwood, or high-density fibreboard core, depending on the product.
That top layer gives the floor its natural grain and character. It is also the part that gets cleaned, scratched, sealed, screened, and sometimes sanded.
The key point is simple: engineered wood can often be renewed, but it cannot be sanded as freely as solid wood.
Solid timber boards are wood all the way through. Engineered boards are not. Some engineered floors have a generous wear layer that can be sanded more than once. Others have a thin veneer that should not be sanded at all, or should only be lightly abraded by a professional.
Before choosing a maintenance method, check:
The thickness of the wear layer
The type of finish already on the floor
Whether the boards are floating, glued, or fixed down
The depth of scratches or wear
Whether the damage is in the finish or in the wood itself
If the flooring information is unavailable, a flooring specialist can often inspect an edge, doorway, threshold, vent, or leftover plank to estimate what is possible.
Whether the search starts with harrenboan floors, parquet, wood floor, engeniering or a specific product brand, the same rule applies: understand the floor before removing material from it.
Cleaning, screening, recoating, and sanding are not the same
Many floor problems look similar at first. A floor may appear grey, dull, patchy, scratched, or dirty. The right treatment depends on what has actually happened to the surface.
Here is the practical difference between common maintenance options.
Maintenance method | What it does | Best for | How aggressive it is |
Cleaning | Removes dirt, grease, residue, and surface marks | Dullness, sticky patches, footprints, everyday grime | Very low |
Polishing or refreshing | Adds temporary shine or light protection, depending on product | Minor dullness on compatible finishes | Low |
Screening | Lightly abrades the existing finish so a new coat can bond | Fine scratches, worn sheen, intact finish | Moderate |
Recoating | Adds a new layer of protective finish | Floors with surface wear but no deep damage | Moderate |
Sanding | Removes finish and a thin layer of wood | Deep scratches, stains, dents, uneven colour, heavy wear | High |
Cleaning removes dirt, not damage
Routine cleaning deals with the contamination sitting on top of the finish. Dust, grit, pet hair, cooking residue, shoe marks, and cleaning product build-up can all make a floor look worse than it is.
A proper clean can restore clarity and sheen, but it cannot remove a scratch that has cut through the finish or into the wood. If the mark catches a fingernail, cleaning alone is unlikely to fix it.
Screening prepares the floor for a new coat
Screening, sometimes called buffing or abrading, lightly scuffs the existing finish. It does not strip the floor back to bare wood. The goal is to create a surface that allows a fresh coat of lacquer, oil, or other compatible finish to bond properly.
Screening is useful when the finish is tired but still mostly intact. It can reduce the appearance of fine surface scratches, but it will not remove deep gouges, dents, black water marks, or areas where the colour has worn unevenly into the timber.
Recoating restores protection
Recoating adds a new protective layer. It is often done after screening, because most finishes need a keyed surface to bond well. Recoating can bring back a more even sheen and extend the life of the floor before full sanding becomes necessary.
The new finish must be compatible with the old one. For example, some oiled floors need maintenance oil rather than lacquer. Some factory-finished floors have coatings that need special preparation. Using the wrong product can cause peeling, cloudiness, tackiness, or uneven drying.
Sanding removes finish and wood
Sanding is the most intensive option. It strips off the old finish and removes a small amount of the wood wear layer. This can reveal fresh timber, remove deeper scratches, correct uneven staining, and prepare the floor for a new finish.
It also carries the highest risk. Sand too far and the veneer can become too thin, expose the core, or create an uneven surface. For that reason, sanding engineered wood is usually a job for experienced professionals, especially when the wear layer is thin.

When cleaning is enough
Cleaning is often enough when the floor looks tired but the finish is still sound. Many homeowners assume dullness means the floor needs sanding, when the real issue is residue or fine grit.
Cleaning may be the right choice if:
The floor looks cloudy but feels smooth
Footprints and smudges show easily
The sheen looks uneven after mopping
There are no deep scratches or bare timber patches
Dirt has collected around skirting boards, doorways, or kitchen zones
The floor feels slightly sticky from previous products
Start with dry removal. Vacuum with a hard floor attachment or sweep with a soft broom. Grit acts like sandpaper under shoes, chair legs, and pet claws.
Then use a damp microfibre mop with a cleaner made for wood floors. The mop should be damp, not wet. Standing water can seep into joints and cause swelling, staining, or edge damage.
Avoid steam cleaners. Heat and moisture can weaken finishes, affect adhesives, and cause movement in some engineered floors. Also avoid bleach, abrasive powders, washing-up liquid, and general household cleaners unless the flooring manufacturer says they are safe.
If the floor improves after a good clean, sanding would have been unnecessary. Keep the routine simple and consistent.
A useful cleaning rhythm is:
Daily or every few days in busy areas Remove grit with a soft broom or vacuum.
Weekly or as needed Damp mop with a suitable wood floor cleaner.
After spills Wipe straight away with a soft cloth.
After muddy foot traffic Let wet mud dry, remove loose dirt, then clean gently.
When screening and recoating make sense
Screening and recoating sit between cleaning and sanding. They are ideal when the protective finish has started to wear, but the wood below is still in good condition.
This method makes sense if:
Scratches are mostly in the topcoat
The floor is dull in walkways but not bare
The colour is still even
There are no deep dents or dark stains
The finish has not peeled, flaked, or failed badly
The floor has enough sound coating left to abrade
Think of recoating as renewing the shield before the wood is exposed. This is often the most cost-effective point to act. Once foot traffic wears through the finish into the timber, the floor may need sanding instead.
A simple test can help, although it is not a substitute for professional advice. Look at the busiest paths, such as entrances, kitchen work zones, hallway turns, and the space around favourite chairs. If the finish is scratched and dull but the colour of the timber still looks consistent, screening and recoating may be enough.
Recoating also helps maintain the original character of the floor. Sanding can change the look, especially if the boards were stained, brushed, smoked, distressed, or factory-finished. A recoat is less likely to remove texture or alter colour.
Before recoating, all contaminants must be removed. Wax, silicone-based cleaners, oil residues, and some polishes can stop the new finish from bonding. This is one reason a test area matters.
When sanding is necessary
Sanding becomes necessary when the damage goes beyond the finish and into the wood, or when the surface is too uneven for a simple recoat.
Common signs include:
Deep scratches that catch a fingernail
Gouges from dragged furniture or sharp objects
Worn patches where bare timber is visible
Grey or dirty-looking traffic lanes that do not clean up
Water marks that have penetrated the wood
Uneven colour from sun fading, rugs, or previous repairs
Old coatings that are peeling, flaking, or badly contaminated
Heavy wear across large areas
Sanding can also help when a homeowner wants to change the finish. For example, a floor may need sanding before moving from a dark stain to a lighter natural finish. That said, engineered wood has limits. Not every floor can handle a full sand.
The condition of the wear layer is the deciding factor. A thicker wear layer gives more room to work. A very thin veneer may only tolerate light abrasion, if that. Be careful around bevelled edges too. Sanding can reduce or remove the bevel, changing the floor’s appearance.
Professional sanding usually involves several stages, from coarser abrasives to finer ones, followed by finishing. The aim is to remove the damage evenly without taking away more wood than needed.
DIY sanding is risky on engineered floors. Drum sanders, edge sanders, and aggressive abrasives can cut through the veneer quickly, especially at board edges or uneven spots. Once the core is exposed, repair options become limited.

How to decide which treatment your floor needs
A careful inspection can prevent costly over-treatment. Work through the floor in natural light and then again with a lamp held low across the surface. Low-angle light makes scratches and wear easier to see.
Use these questions to guide the decision.
What you see | Likely issue | Suitable approach |
Dull surface with no obvious scratches | Dirt, residue, or light wear | Clean first |
Fine scratches visible in light | Surface finish wear | Screen and recoat |
Bare wood in walkways | Finish worn through | Sanding may be needed |
Black or dark water marks | Moisture has penetrated | Sanding or board repair may be needed |
Deep gouges | Wood damage | Local repair or sanding |
Peeling finish | Failed coating or contamination | Professional assessment |
Uneven colour across the room | UV fade, wear, or old stain | Sanding may be needed |
The safest rule is to start gently. Clean before you recoat, and assess before you sand.
If the floor still looks poor after proper cleaning, move to a finish assessment. If the damage is only in the coating, screening and recoating may restore the floor. If the timber itself is damaged, sanding or board replacement may be the better route.
For small isolated damage, a local repair can be more sensible than treating the whole room. A flooring professional may fill a scratch, touch in colour, replace one board, or blend a repair into the surrounding area.
Care habits that extend the life of engineered wood floors
The best way to avoid sanding is to protect the finish from daily wear. Engineered wood floors can last for many years with sensible care, but small habits make a large difference.
Control grit at the door
Most scratches start with grit. Use good doormats at entrances and clean them often. Outdoor mats catch larger debris, while indoor mats remove finer particles. In wet weather, this also reduces moisture carried onto the floor.
Avoid rubber-backed mats unless they are approved for wood floors. Some backings can stain or react with finishes.
Use furniture protection
Fit felt pads under chair legs, tables, sofas, and moveable furniture. Replace them when they collect grit or flatten. Lift furniture rather than dragging it.
For office chairs at home, use a wood-floor-safe chair mat or soft castors designed for hard floors. Standard hard plastic castors can mark finishes quickly.
Manage moisture carefully
Engineered wood is more stable than solid wood, but it is still wood. Wipe spills promptly. Pay attention near sinks, dishwashers, pet bowls, plant pots, and exterior doors.
Use trays under plants and avoid overfilling pet water bowls. If a leak happens, dry the area quickly and check whether water has reached board joints.
Clean with the right products
Use cleaners designed for wood flooring and follow the finish type. Lacquered, oiled, and hardwax oiled surfaces may need different care.
Avoid products that promise a quick shine unless they are compatible with the floor. Some leave residues that attract dirt or make future recoating difficult.
Keep indoor conditions steady
Wood expands and contracts with changes in humidity. In UK homes, seasonal changes are normal, especially with heating in winter. Try to keep the indoor environment reasonably stable. Very dry air can cause gaps, while excessive moisture can cause swelling.
Good ventilation, prompt spill control, and steady heating habits all help.
Act before the finish wears through
Recoating at the right time can delay sanding. Do not wait until the floor has bare grey patches in traffic lanes. Once the finish has worn away, dirt and moisture can enter the timber itself.
A quick annual inspection is useful. Look at entrances, hallways, kitchens, and spaces under dining chairs. These areas usually show wear first.

A simple maintenance plan for homeowners
A clear plan removes guesswork. The floor does not need constant attention, but it does need consistent care.
Every day or two in busy homes
Sweep or vacuum grit from high-traffic areas. Focus on entrances, kitchens, and hallways.
Every week
Damp mop with a suitable wood floor cleaner. Use as little moisture as possible and dry any wet patches.
Every few months
Check felt pads, mats, chair legs, and areas around water sources. Replace worn pads and clean under rugs.
Once a year
Inspect the finish in good light. Look for dull traffic lanes, fine scratches, and any spots where the wood looks exposed.
When the sheen is worn but the wood is sound
Ask about screening and recoating. This can add protection before damage deepens.
When scratches, stains, or bare patches are obvious
Get a professional assessment before sanding. Confirm whether the wear layer is thick enough and whether repairs are possible.
The best choice is the least aggressive one that works
Engineered wood floor maintenance is not a choice between doing nothing and full sanding. There are useful steps in between.
Cleaning handles dirt and residue. Screening prepares an existing finish for a new coat. Recoating restores protection when the timber is still sound. Sanding is reserved for deeper damage, heavy wear, failed finishes, or major colour correction.
The right decision protects both the look of the floor and the limited wear layer beneath it. Start with a careful clean, inspect the surface honestly, and only move to sanding when the condition of the wood truly calls for it. That approach keeps engineered wood floors looking better for longer and helps avoid removing more material than necessary.


Comments